Hilton is a Staff Writer with TheGamer from Ireland, and a self-proclaimed Zelda Historian. They’re passionate about a whole bunch of games, from obscure indies to the most overly praised AAA. They studied Games Development at University and decided to put that knowledge to use writing about them instead of making them. They are also a digital photographer aficionado and waste most of their time taking silly in-game images.
Delving deep into the fantasy of the Wuxia setting, Where Winds Meet blends the grandstanding philosophies of heroes with over-the-top action, absurd humour, and gravity-defying movement. And sometimes, all of those themes blend together into one quest, such as the Cries In The Distance Lost Chapter.
In this quest, we hear the voice of someone familiar calling from the distance, and fining them only leads to more questions, puzzles, and bosses, with every piece somehow encompassing everything that represents the game. Everything is a puzzle in this quest though, so here’s our helpful guide on just how you’re supposed to solve them.
How To Start The Cries In The Distance Quest
If you’re by the Peace Bell Tower in the Moonveil Mountain area in Qinghe, your intent may be to repair the Bell of Demoncalm. Though once you arrive, you’re likely to hear the cries of help from someone else nearby. By following the sounds of their cries, which can be seen the the helpful little UI element that pops up, you’ll be brought to a secret cellar door on the floor, in a small little alcove slightly down the mountain.
Enter through this door to formally begin the quest, and talk to Feng Jisheng through yet another wall he’s found himself trapped behind. Just follow his directions to burn down the branches on the opposite wall to find a button you can step on, unlocking the wall he was trapped behind as well as activating the considerably more complex yin-yang puzzle.
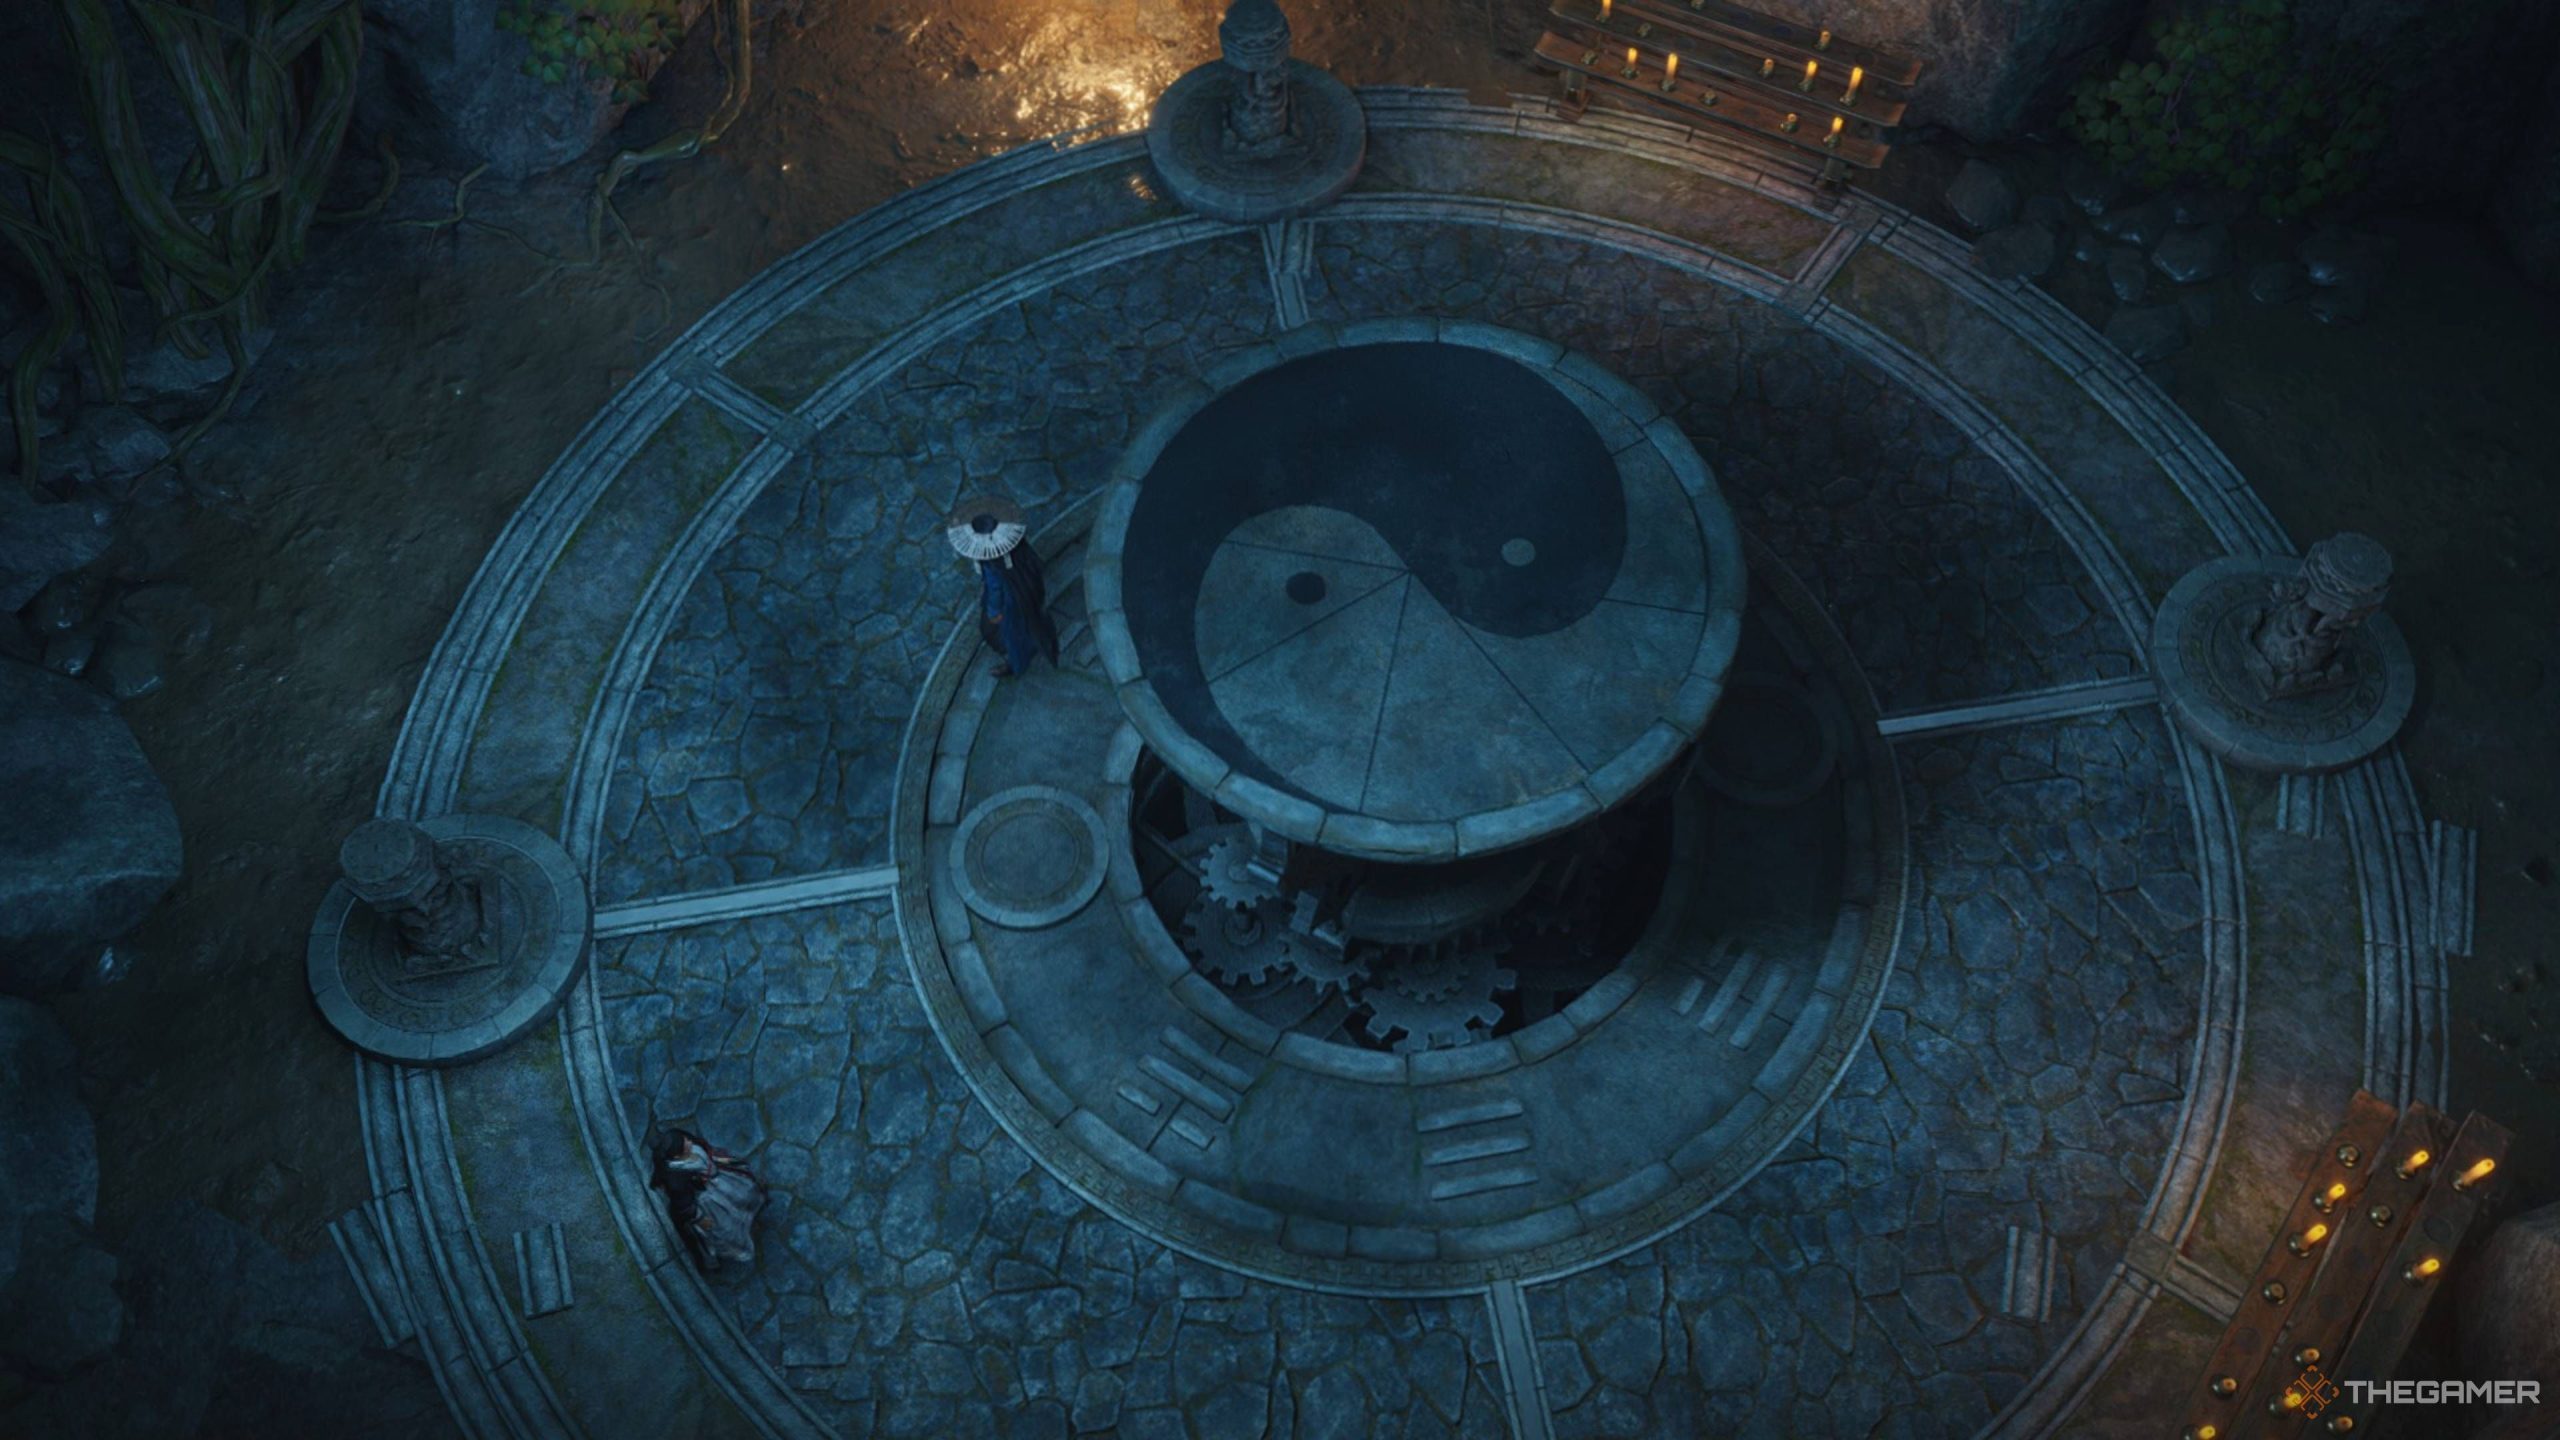
The yin-yang symbol in the centre of the room raises up now, and both it and the four statues around it can now all be rotated, though to what end? Feng Jisheng explains to you that the intent of the yin-yang is to harmonise the various elements of Earth, Heaven, Fire, and Water. Earth and Heaven work together, while Fire and Water oppose each other.
The goal with the yin-yang is to flip this. Allow Fire and Water to harmonise, and Earth and Heaven to be opposed. And the end goal of this is to make the Heaven and Earth statues look away from each other, and Fire and Water to face each other. But how do you work out which statue is which?
Well, unless you know Chinese characters, you can’t. But you also don’t strictly need to. The image that appears when you examine the yin-yang symbol shows the symbols in each cardinal direction, which matches to the in-game directions. So Heaven and Earth and north and south, while Fire and Water are east and west. There are also various lines on both the image and the ground in front of you, letting you align them more easily.
When you move one statue, it may cause the one on the opposite side to also rotate. If this is the case, rotate the yin-yang symbol in the centre to allow them to be moved independently. The end goal here is to have Fire and Water, east and west, facing each other. This will have them both looking towards the centre, where there will also be two circles on the on the inner ring.
Rotate the yin-yang symbol again to allow the Heaven and Earth statues to be rotated separately, and have them face away from each other. If you’ve done so correctly, then mist will flow into the centre from all four statues and the yin-yang symbol will descend, revealing a secret room below.
If all that sounds a bit complex, you can just make the statues align with how they’re shown in the image above.
After dropping down from above, you will enter into the room in which Tian Ying stayed while he studied the fundamentals of Tai Chi and created some new techniques of his own. Your task now is to read and pick up everything you can to find out where Tian Ying went, where his research is, and who stayed with him.
This part is pretty simple, with every item found easily in this room and already glowing for your ease. Just interact with everything, and read them if you actually want some lore and character information, and then head to another wall that is actually a secret door with Feng and unlock it with the jade piece you picked up, then proceed into the following room.
Defeating The Thick-Skinned Albino Bear
As you walk ahead, you’ll see what very clearly looks to be an arena ahead, and right you would be in that. As you get close, a bear appears, specifically a Thick-Skinned Albino. Feng will note that this part looks to have a particularly thick hide and that regular attacks may have no effect whatsoever. And he is right.
By subscribing, you agree to receive newsletter and marketing emails, and accept Valnet’s Terms of Use and Privacy Policy. You can unsubscribe anytime.
But what did Tian Ying come here to study? Tai Chi. And where did you first learn Tai Chi? That’s right, from a bear. There are three stone piles around the area, and the bear will lose a third of their health every time you throw them into one. So all you have to do is grab them with Tai Chi and toss them into the rocks. Easy!
Make sure you’re roughly facing in the direction of the rocks when you use Tai Chi on the bear as you may not get enough time to aim precisely before they’re thrown.
After you’ve beaten them, make sure to take the contents of the two smaller chests before proceeding on to the last big one, which must be interacted with to complete the quest. And that’s it, quest complete!
We want to hear from you! Share your opinions in the thread below and remember to keep it respectful.
Please respect our community guidelines. No links, inappropriate language, or spam.


